
When working with a digital marketing agency, a freelancer or sometimes even an in-house digital marketing executive they will need access to all areas in regard to Google tracking and monitoring.
For a dynamic approach to tracking their digital marketing efforts they will need – at minimum – to be able to manage Google Search Console, Google Analytics & Google My Business.
So in this article, we’re going to give you a step-by-step guide on how to add users on each one of these platforms to make sure you can quickly equip your digital marketing experts with all of the tools they need to gather insightful data.
Google Search Console
We’re running on the assumption that your website already has Google Search Console configurated and setup correctly. If you have not already got this in place then check out this article on how you can do so.
Step 1: Open up your Google Search Console here. You may need to login with the correct Google Account.
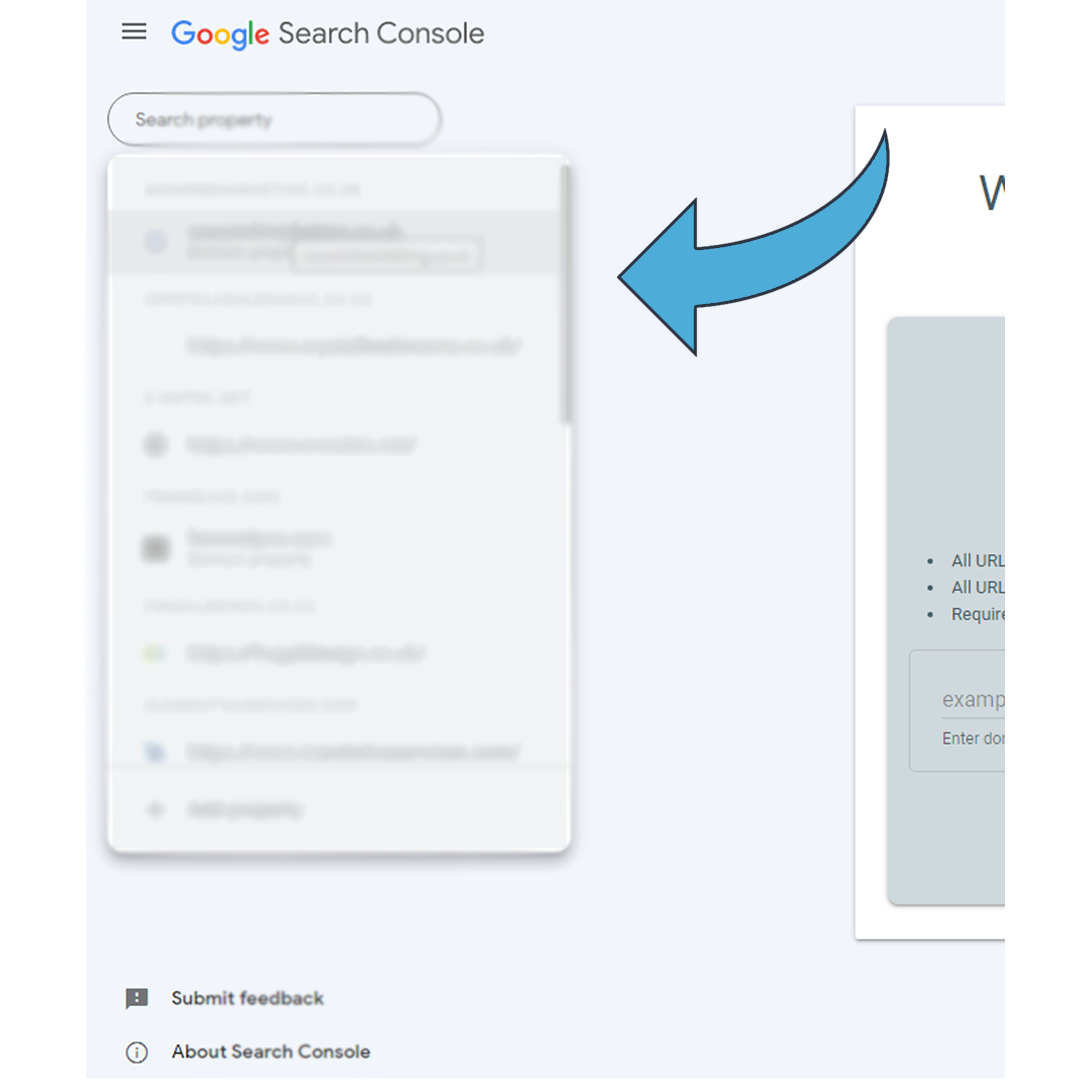
Step 2: Select the property you wish to add a new user to from the dropdown menu on the left hand side.
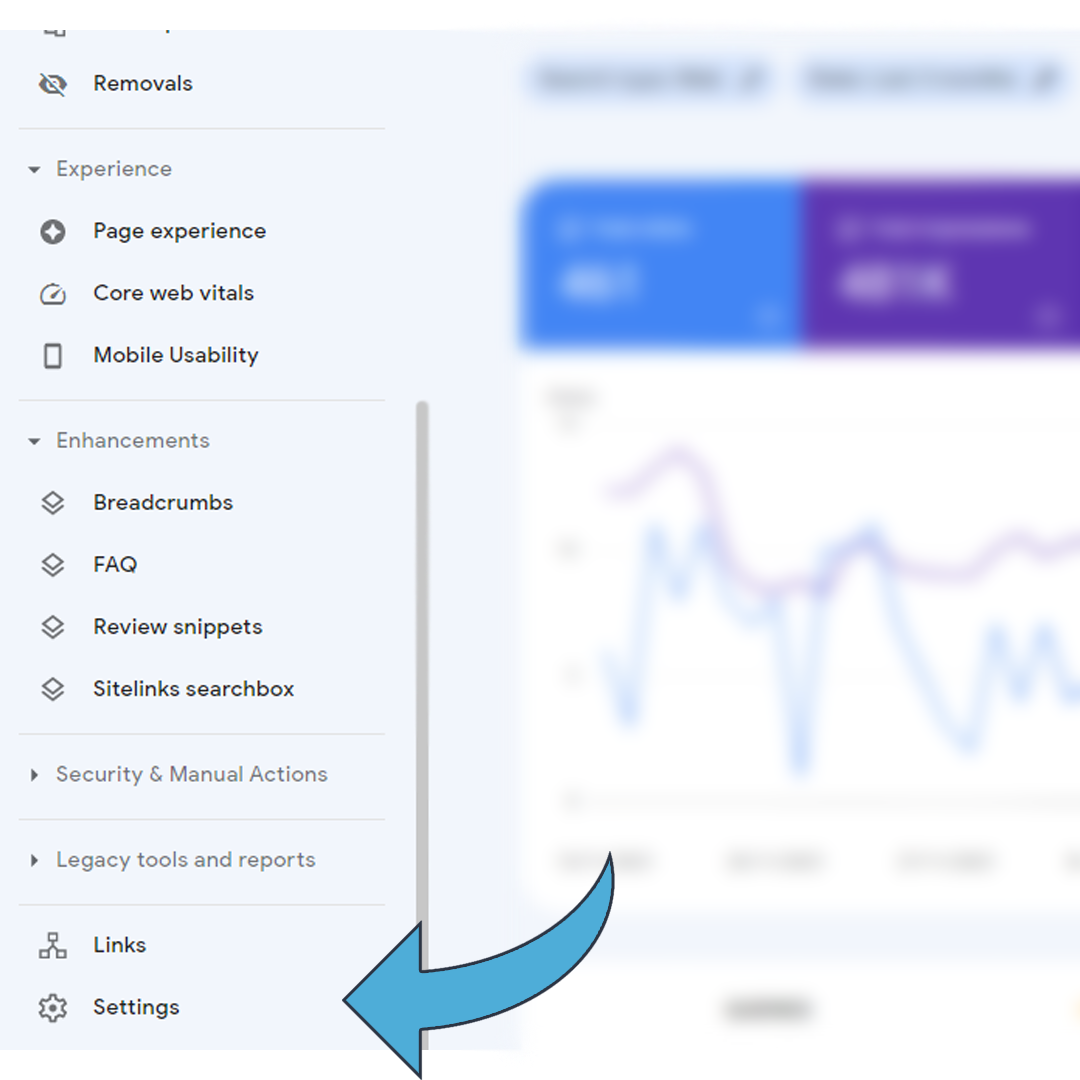
Step 3: Once in the correct property, navigate to the settings section.
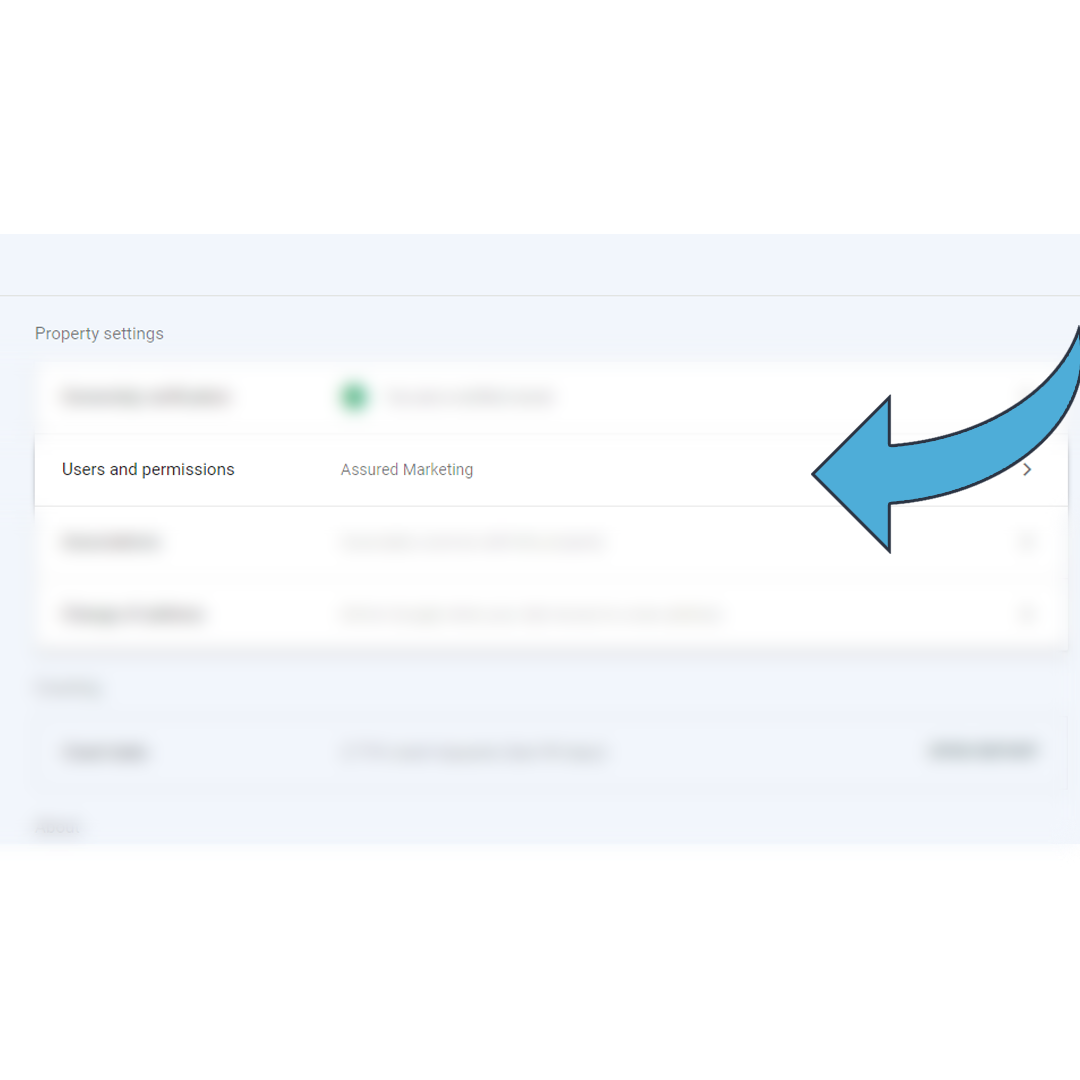
Step 4: In settings, select the Users and Permissions section.
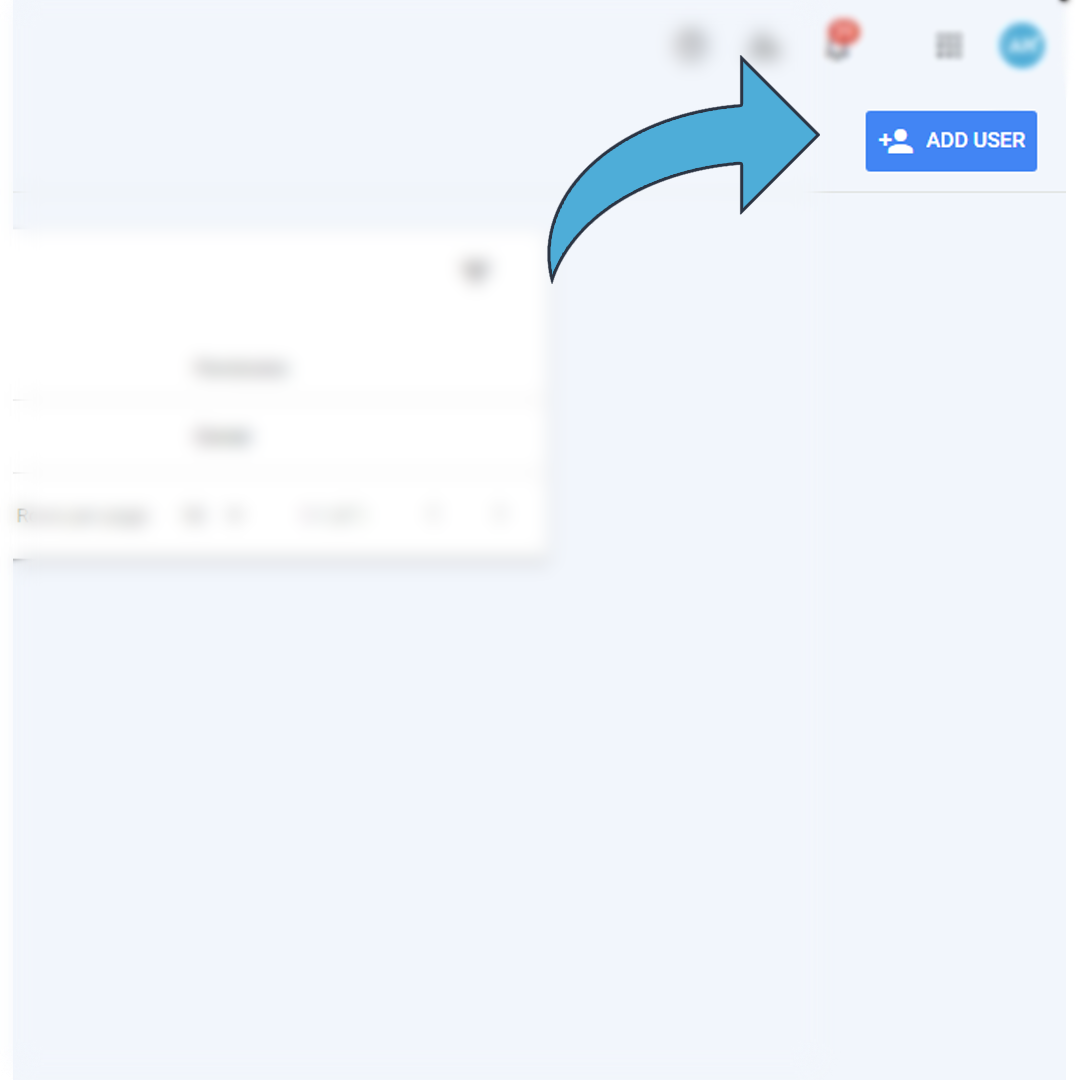
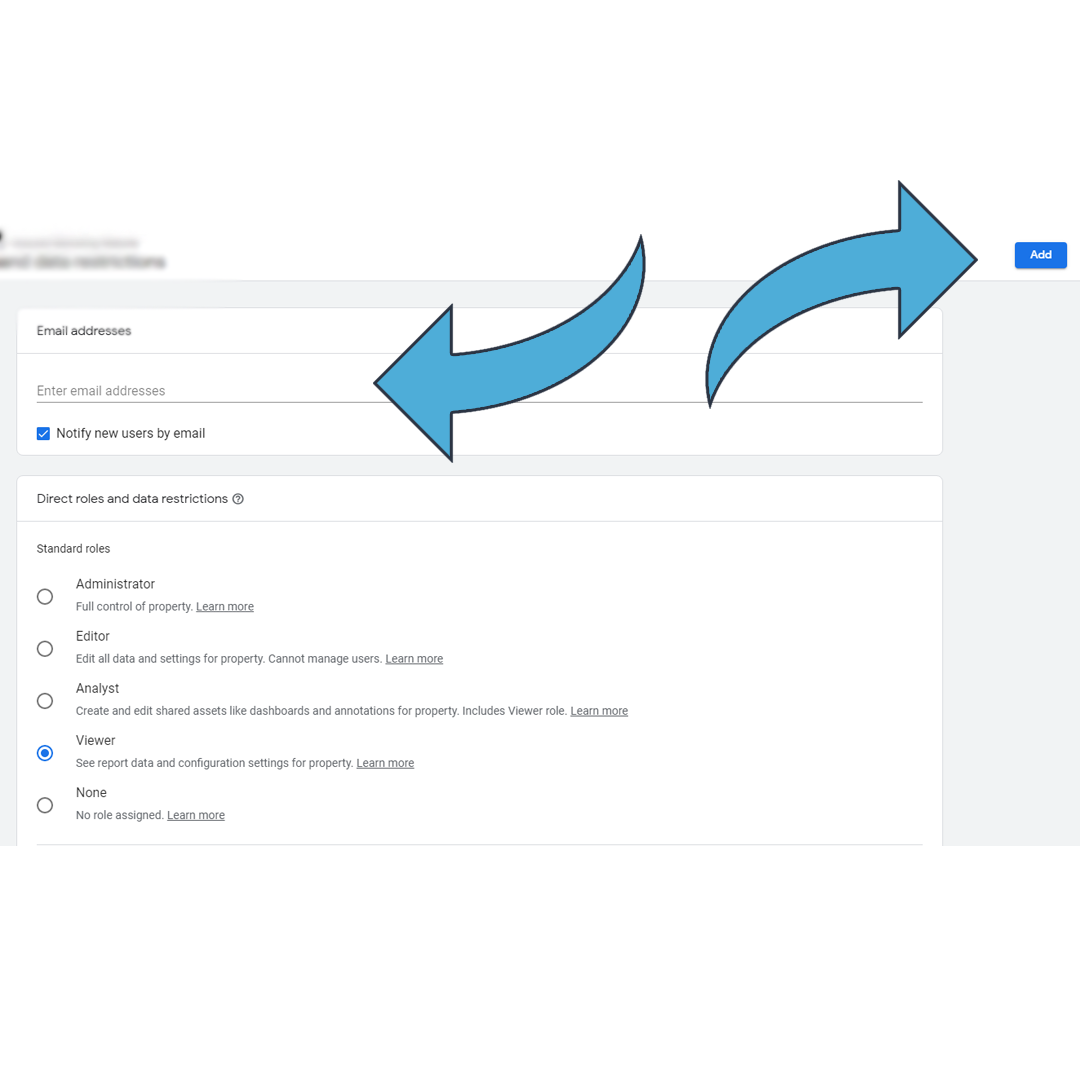
Step 5: Now select add user in the top right hand corner.
Step 6: Finally, enter the email address of the person or business that you wish to grant access to. Choose their permission level (for what the different options mean – check out this article) and send the request. The other party will then be notified via email and will be able to accept their invitation.
All done! You will now have successfully added a new user to your Google Search Console.
Google Analytics
As with Search Console, Google Analytics is crucial for marketers to collect the best data possible from your website and to track various traffic sources along with user actions. The platform allows you to add multiple users with different levels of permission.
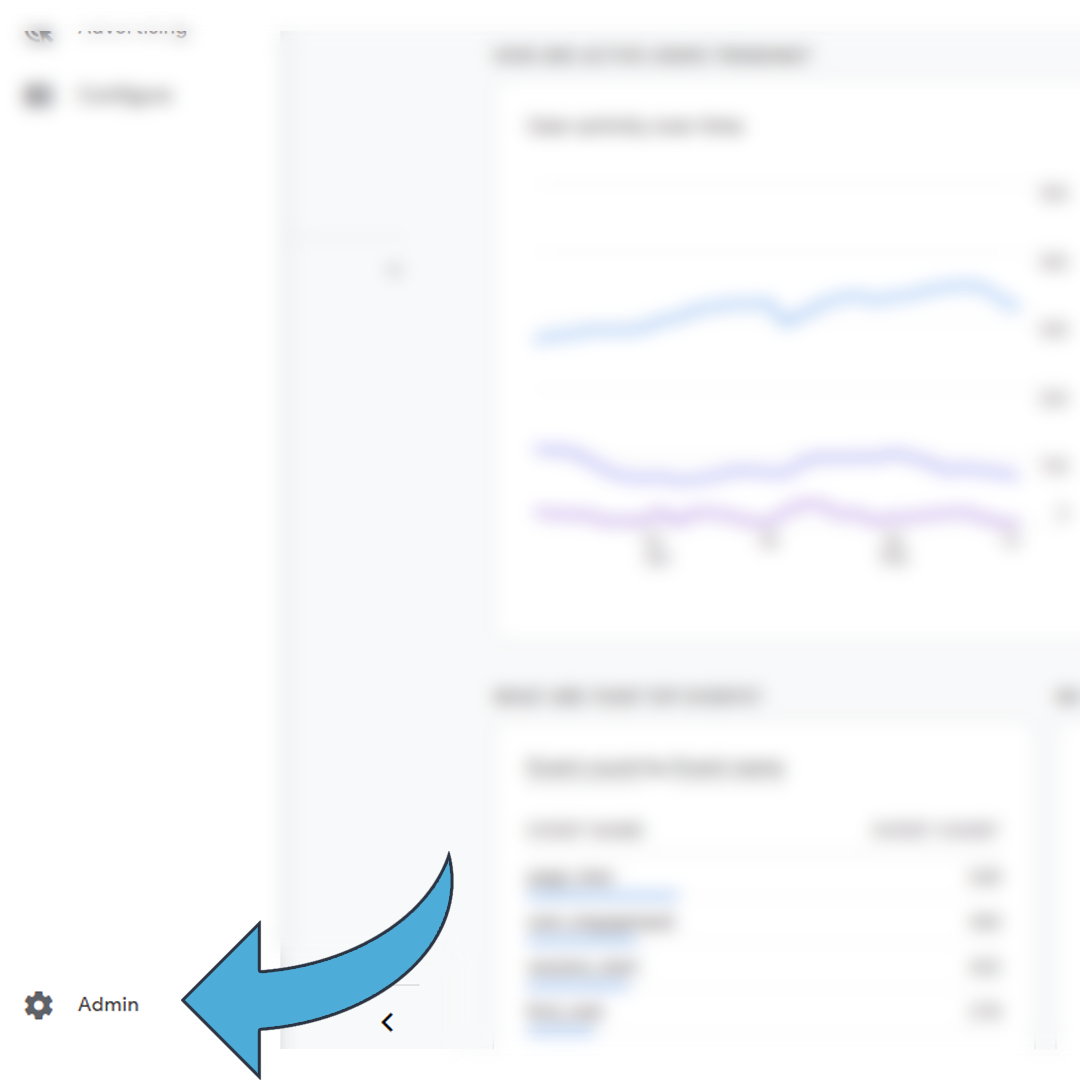
Step 1: Navigate to the admin panel on the left hand side.
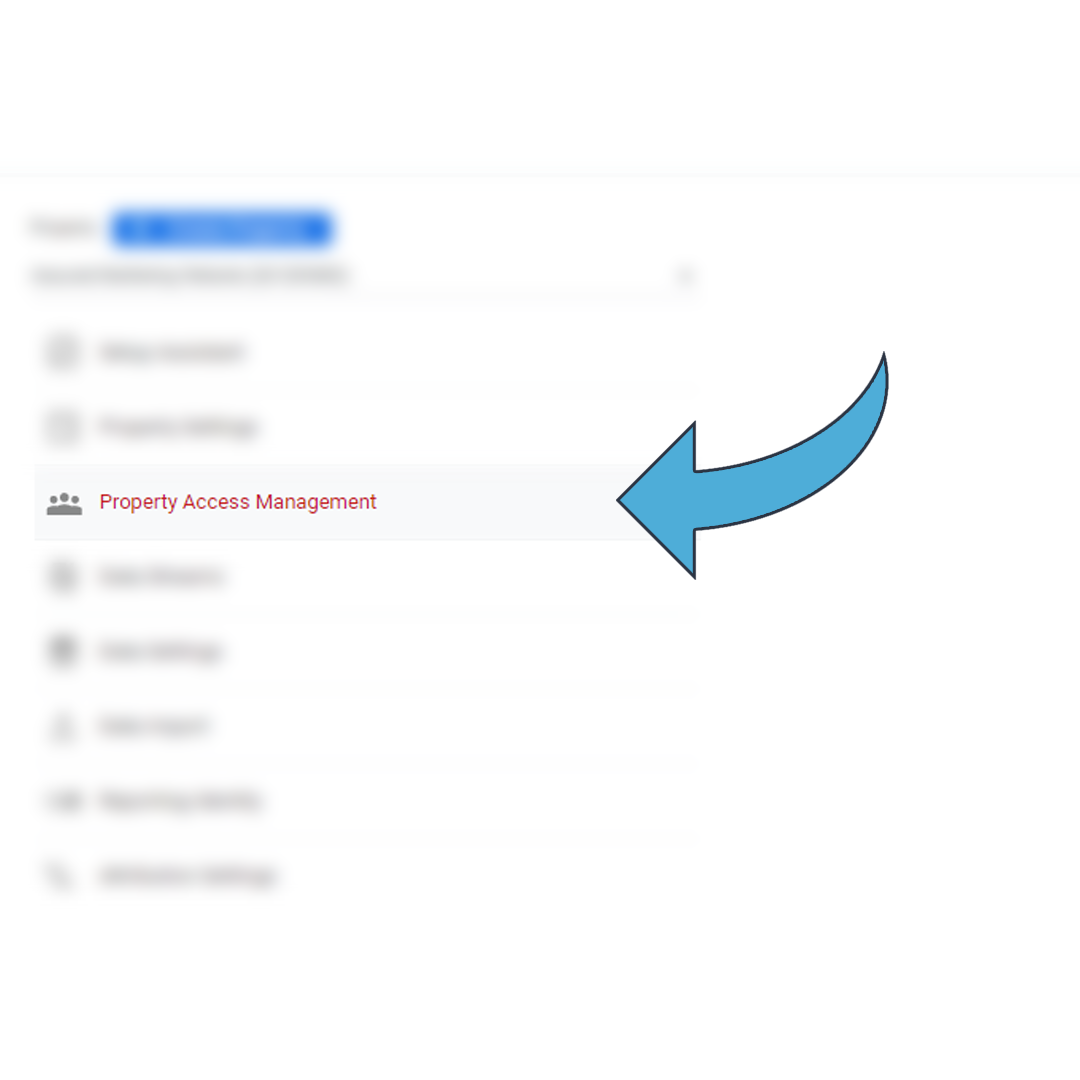
Step 2: Ensuring you have the right property selected – then click on Property Access Management
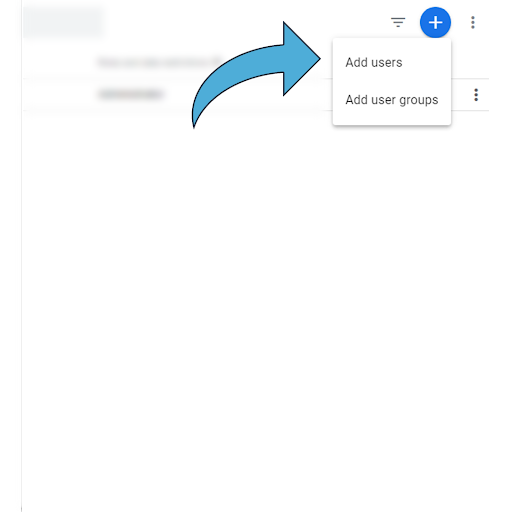
Step 3: Select the blue ‘plus’ icon in the top right and select ‘add user
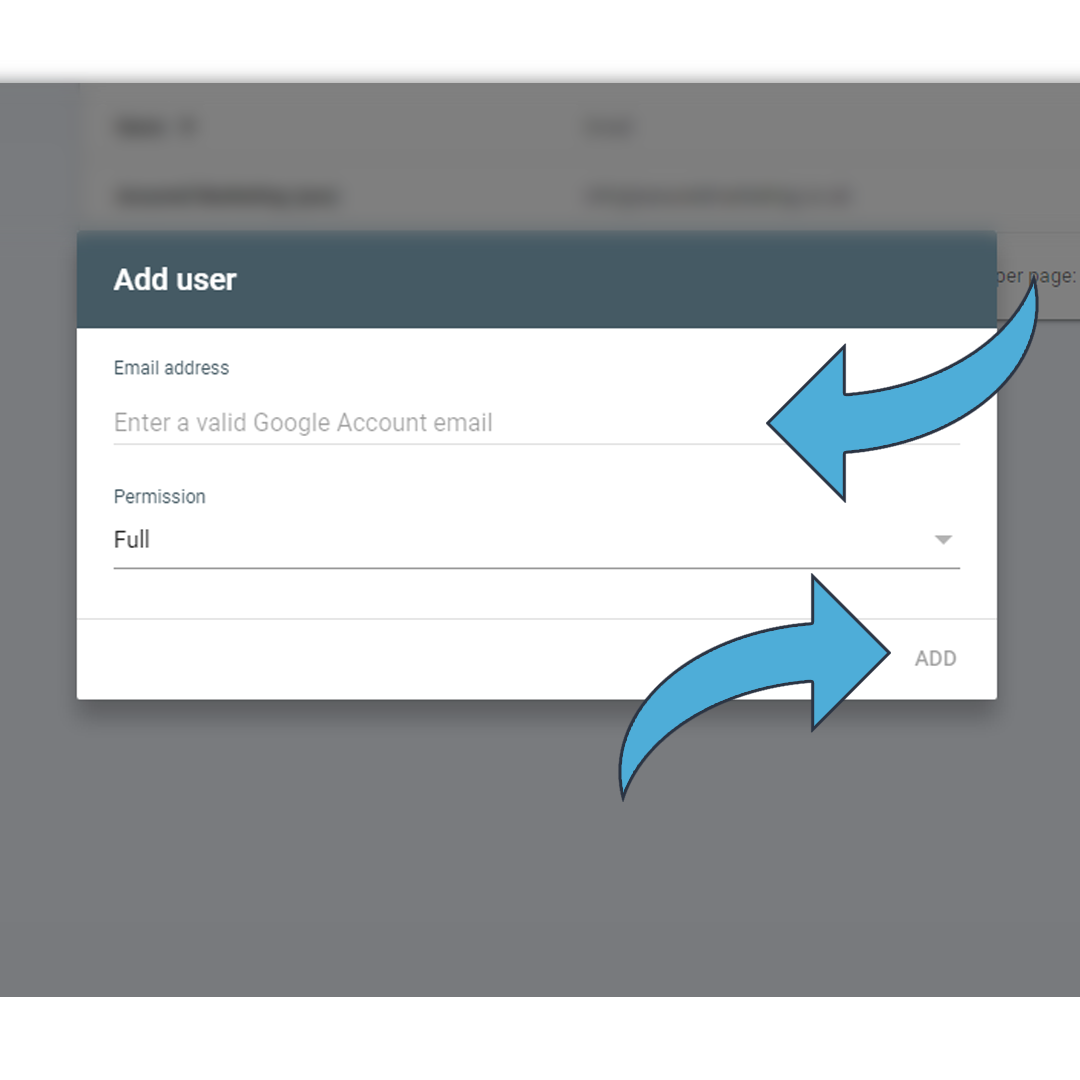
Step 4: Enter the new user’s email address, select their permission level (Google explains below the changes that can be made by each one) and click ‘add’. The new user will then be notified via email and will be able to accept their invitation.
Now you’re all set with a new user on Google Analytics. For more information on what can be achieved through Google Analytics, take a look at this article.
Google My Business
Your Google My Business listing is great for tracking how your business is appearing in directory views as well as Google Maps views and is particularly important if your business relies heavily on footfall for trade. A much simpler process for adding new users than Google Search Console or Analytics, but see below how you can add users in 3 simple steps.
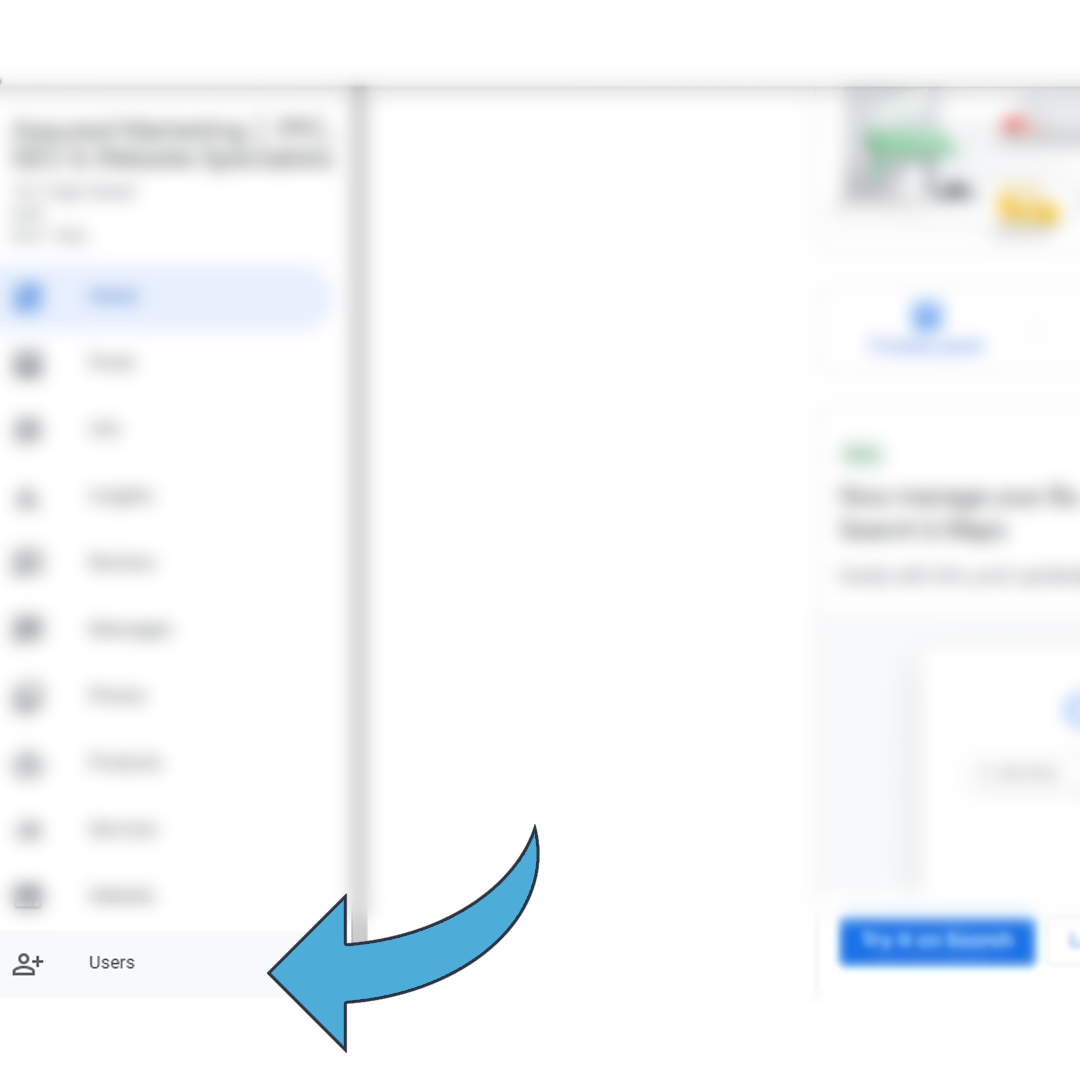
Step 1: From the GMB dashboard, select users on the left-hand menu.
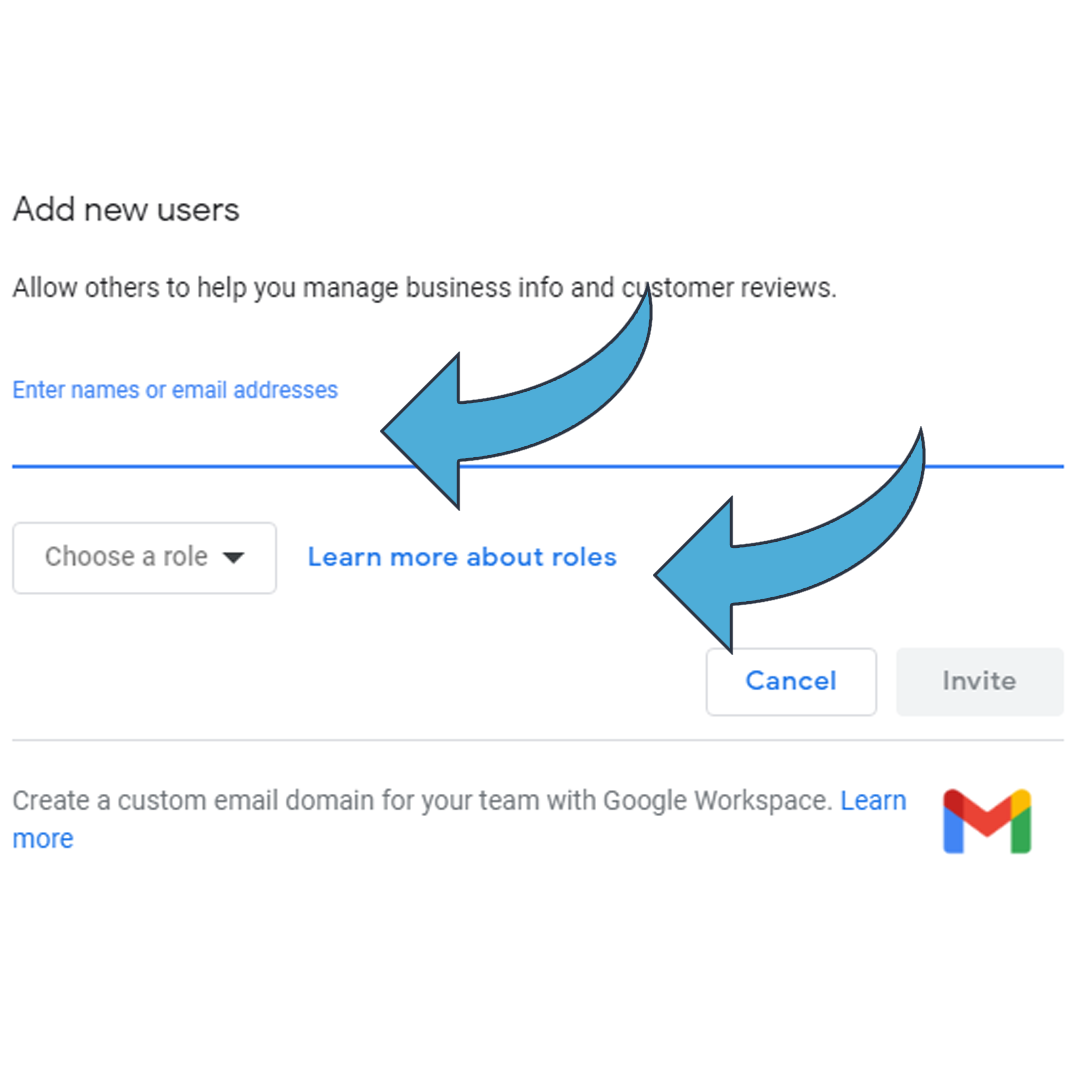
Step 2: Select ‘add users’ in the top right-hand corner of the pop-up box that is displayed.

Step 3: Finally, add their email address and select their role. Again – different roles will have different permissions and you can click the link next to this box if you wish to clarify which role is best. Then send the invitation and the ne user will be able to accept via email.
And that’s everything. So, from Google Search Console through to Google My Business you will now be able to add new users who can manage these platforms on your behalf.
0 Comments